
May 7, 2024


.svg)

Imagine working on a document with colleagues simultaneously. You type a sentence, and it instantly appears on everyone else's screens, no refresh button is needed. This seamless collaboration is made possible by a powerful technology called WebSockets.
WebSockets are communication protocols that establish a persistent, two-way connection between a web browser (client) and a web server. Unlike HTTP, which operates on a request-response basis, WebSockets create an open channel for continuous data exchange in both directions – just like in our Google Docs example.
Think of it like a constant conversation:
WebSockets are great for building real-time functionality into web applications, such as games and chat apps, or for communicating financial trading data or IoT sensor data.
In this article, let’s create a WebSocket server, and use Postman to send and receive messages across the WebSocket connection.
Create a new directory named websockets
mkdir websockets
Initialize the project using npm
npm init -y
Install the WebSocket library in the project
npm install ws --save
Create a file name server.js in the root directory
import { WebSocketServer } from 'ws';

const wss = new WebSocketServer({ port: 8080 });

wss.on('connection', function connection(ws) {
    ws.on('message', function message(data) {
        console.log('received: %s', data);
    });

    ws.send('Hey!, Welcome to the websocket server!');
});
Run the server
node server.js
To test our WebSocket server we will be using Postman.
In Postman, select New > WebSocket Request to open a new tab. Enter the WebSocket server URL. A WebSocket URL begins with ws:// or wss:// and our server is running on localhost:8080. Click Connect.
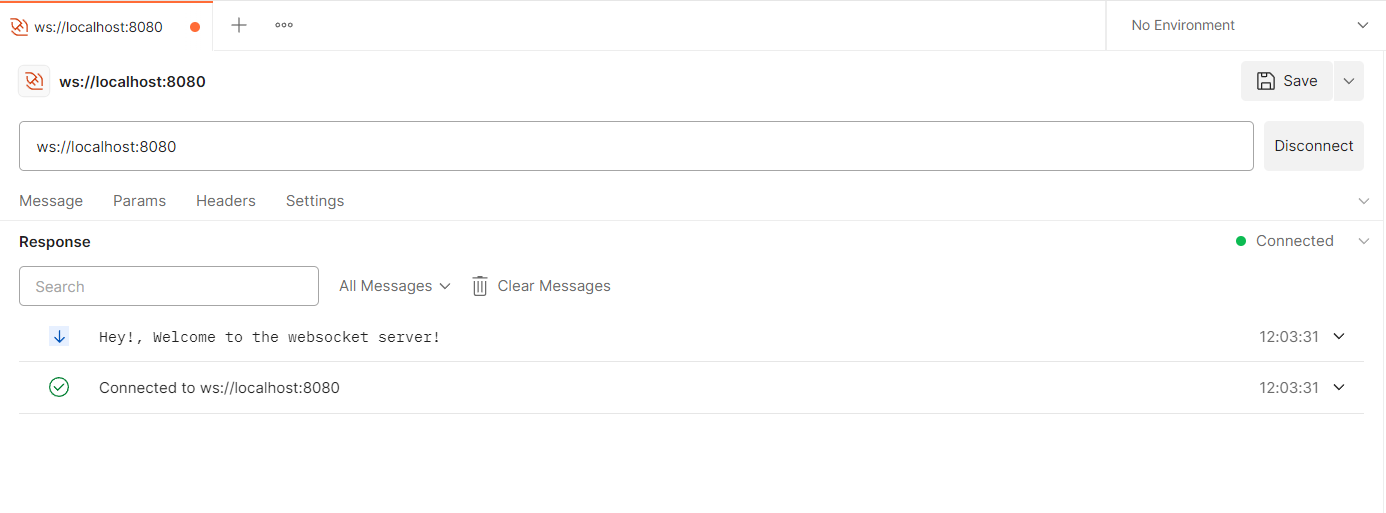
Once the connection between the server and the postman is established, the Message pane will display the list of incoming and outgoing network messages.
The connection we established between the Postman client and the local server is bidirectional, which means that in addition to receiving messages, we can also send them. Under the Message tab, write your message and click Send.
We may check the outgoing message in the Messages pane.


Let's update our WebSocket server and use it to send computer information in a set of interval
Let's install the system information package
npm install systeminformation
Let's add the function that will send a message about the current load on our CPU.
import si from "systeminformation";

 setInterval(async () => {
    const cpuTemp = JSON.stringify(await si.currentLoad());
    ws.send(cpuTemp);
  }, 1000);
Here is the fully updated server.js file
import { WebSocketServer } from 'ws';
import si from "systeminformation";

const wss = new WebSocketServer({ port: 8080 });

wss.on('connection', function connection(ws) {
    ws.on('message', function message(data) {
        console.log('received: %s', data);
    });

    ws.send('Hey!, Welcome to the websocket server!');
    setInterval(async () => {
        const cpuTemp = JSON.stringify(await si.currentLoad());
        ws.send(cpuTemp);
    }, 1000);
});
Save your changes, and restart the local server from the command line:
node server.js
Return to Postman and Connect to the local server. This time, we receive information about our CPU every second!

We have explored the core concepts and walked through building a basic server that sends CPU load time to the client. It's just the beginning, we can leverage WebSockets to build applications that unleash the power of real-time communication like chat applications, real-time notifications etc.
Github source code - https://github.com/icon-gaurav/node-websockets.git

.svg)

Join 6000+ industry executives who trust us.
Join 6000+ industry executives who trust us.

Subscribe to our newsletter, one trusted by thousands of C-suite executives.


.svg)
.svg)
.svg)
.svg)